
Concrete Jungle: making of

Concrete Jungle is how i call my loudspeakers. Why? They are made of concrete and when i look at them, they reminds me of some concrete buildings ... a suburb jungle of grey buildings. And the second reason is i like jungle (music style) a lot. This is a little article where you can get some information on how to make your own concrete speakers and the main reason - it's for me to show off.
Why concrete speakers? Well, they look good and they won't be possibly ever stolen because they're heavy like hell. But they also sound good. Usually, speakers are made of wood or some panels made of materials specially designed for this purpose. But the common denominator is those materials won't (or at least aren't supposed to) deform as they're subject to loudspeaker vibrations. It's because the deformations create additional sound waves and thus cause sound distortion. And believe me, the concrete is pretty stiff.
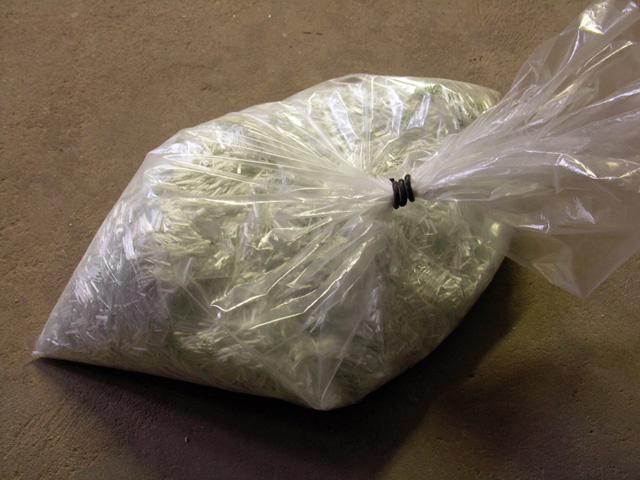
The speakers themselves are cast to polystyrene forms. Wall thickness is 20mm, but it is structured on inner side so the shells aren't so heavy. The inner volume is more than 75l, outer dimensions are 410x420x620mm. I used pretty common concrete you can get in the store, with addition of glass fibre. I don't know where you can get glass fibre, but you can put there a piece of rabbit fence to enforce the concrete. You can see pouch of fibre here:
Shaping the polystyrene forms
You will need a lot of polystyrene, because you need forms for both speakers as they are destroyed when removing from the speakers. The form itself is two-part: you need the outer form and the form of the core (the shape of inside of the shell). They both have to withstand the weight of concrete, i used 80mm thick panels.
As for cutting i used 'tool' one of my neighbours kindly provided me with. It's basically a powered wire which is therefore hot. I needed to regulate it a little because it was nice to have it a little bit hottier for cutting the large pieces and a little colder for cutting precise / small elements where i couldn't cut so fast and the polystyrene just melted in my hands. Here are some pictures of the workshop:
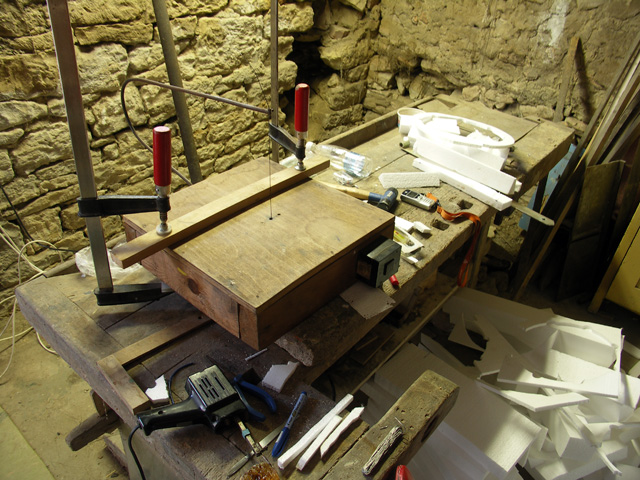
the cutter tool
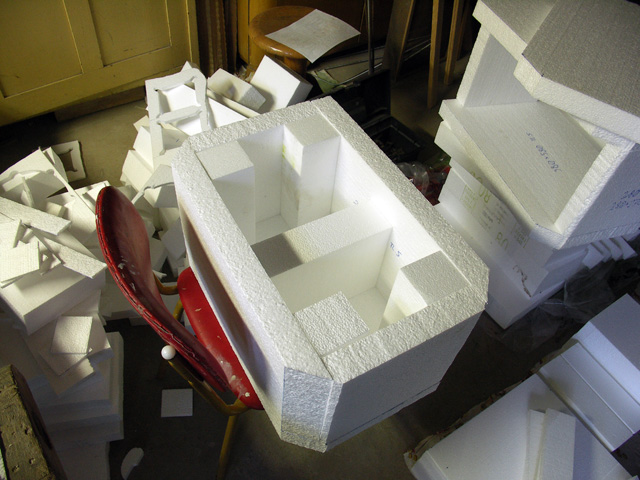
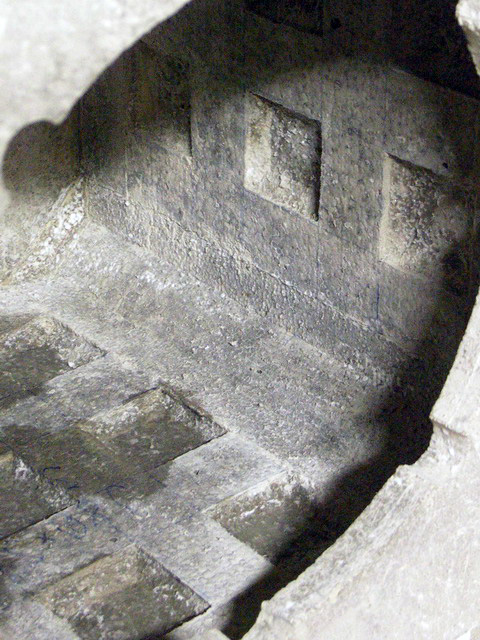
core structure (notice the middle block)

final pieces, ready to be glued together
outer-shape forms
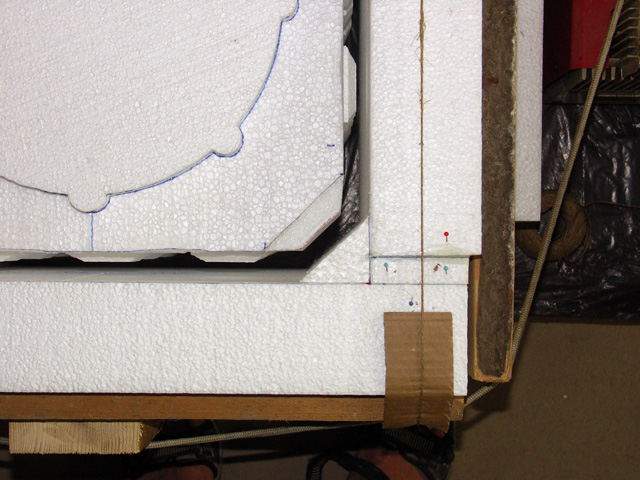
You can see the outer shape forms are made of more pieces than they need. That's because originally the walls should be 10mm thick only, but it didn't seem to be enough so i had to extend them with some extra pieces. But then again, 20mm walls would come out really heavy, that's when the idea of de-weighting elements came to me.
The elements themselves are just a little squares with chamfered edges, glued to the core form. They make up nice grid so walls are thick 20mm on some places, forming a nice 'cage' and only 10mm otherwise. That should make compromise between the sturdiness and weight.
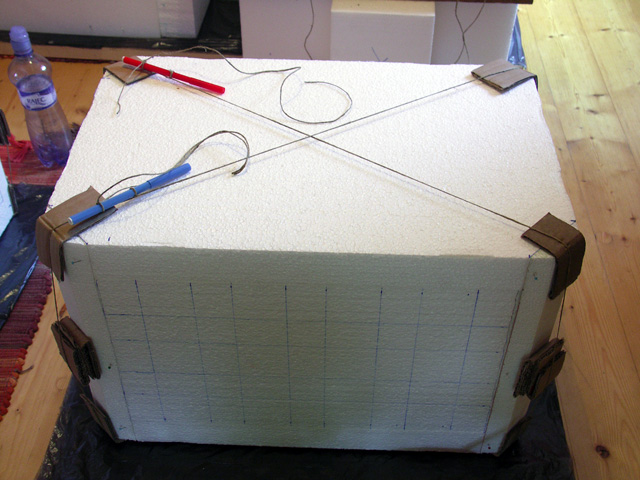
glueing core (the paper rectangles and strings hold it together)
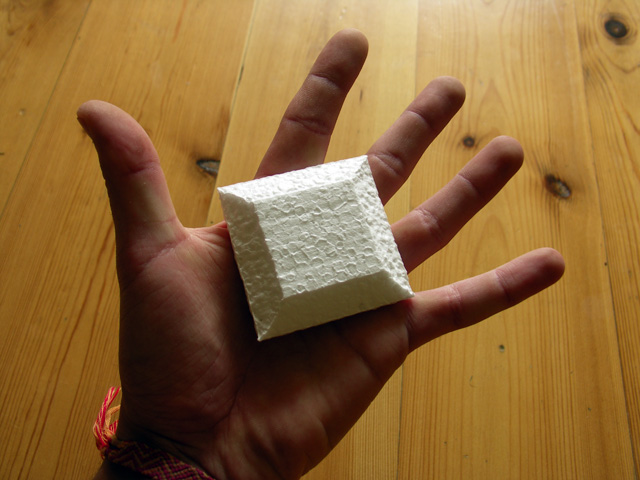
de-weighting element detail
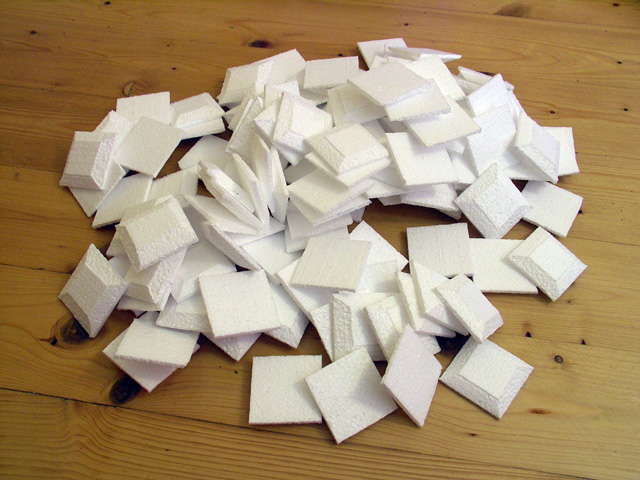
pile of de-weighting elements (i made more than i needed and used the nicer ones only)
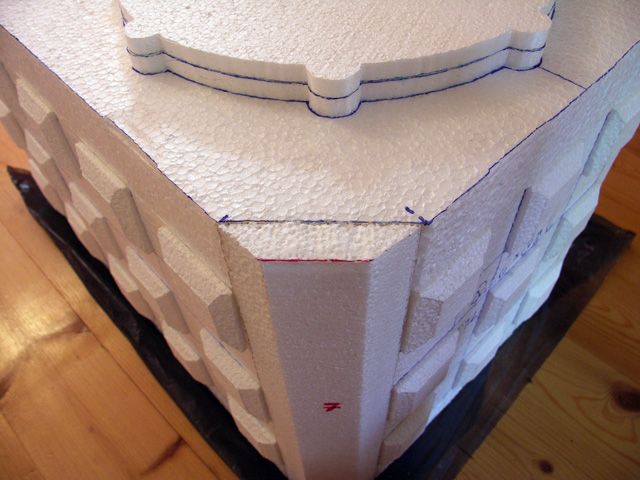
core detail
It took me quite a long time to put it all together. But then, the promised day finally came.
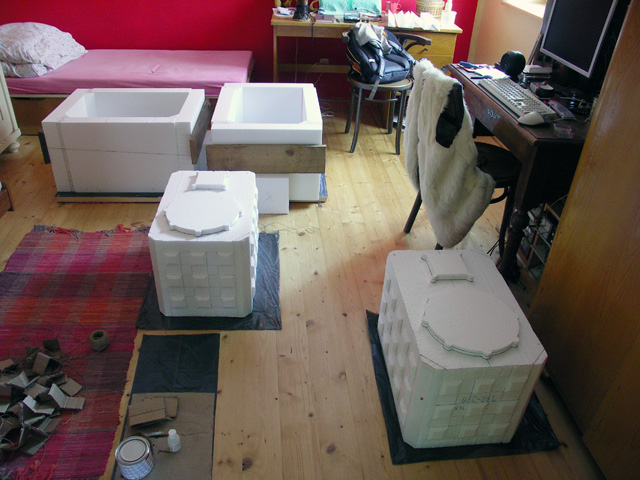
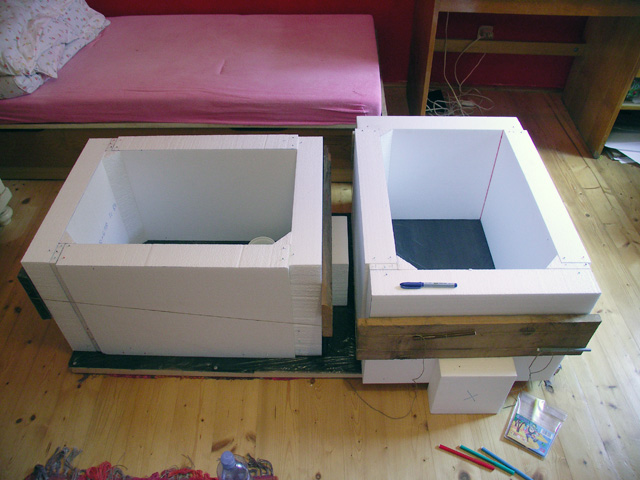
final look of forms
Pouring concrete
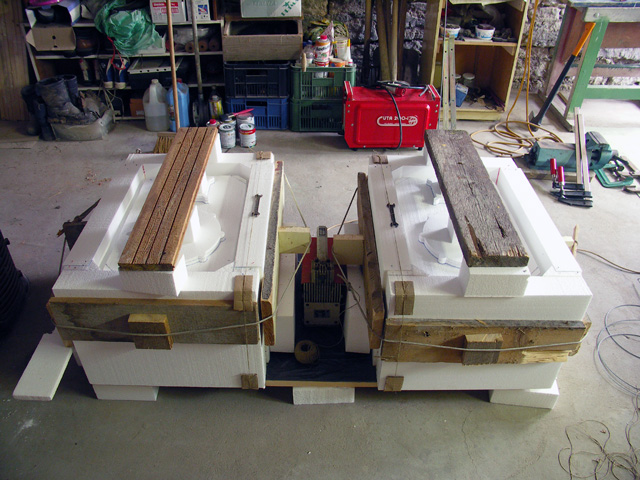
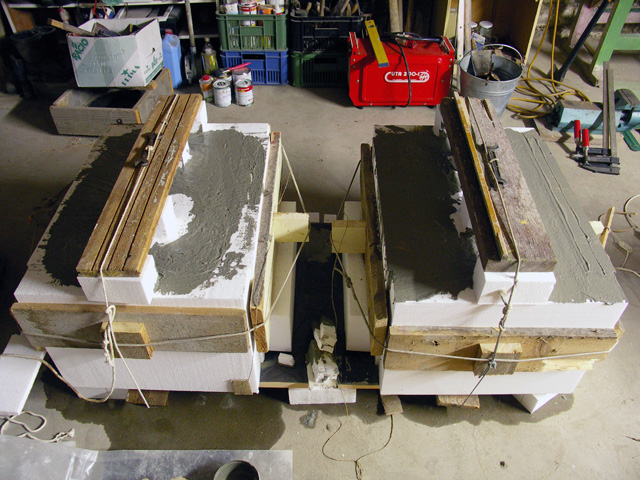
Before pouring concrete i had to arrange forms and provide them with some support to prevent their deformation once heavy concrete is inside. It also turrned out to be a bit tricky to get the concrete inside. The de-weighting squares were cause of a few air bubbles i had to fix later. But it could be helped by making the concrete a little bit thinner.
For the concrete i used a little stronger concrete / sand ratio to make it harder. The forms were laid on large wood plank, covered with plastic foil. First the outer forms were filled with 20mm thick layer of concrete that would make up the back side. Then the cores were put in and the concrete was poured arround while poking in with the stick to help air escape. It was very exciting work as it was the critical point where it would decide wheter the weeks of work i made cores would pay off or come to waste. Once it was done i couldn't wait for the concrete to harden, but it tooks some time. I let it rest for two weeks, while continually watering it. I also made a little concrete board so i could see how hard is it at any point.
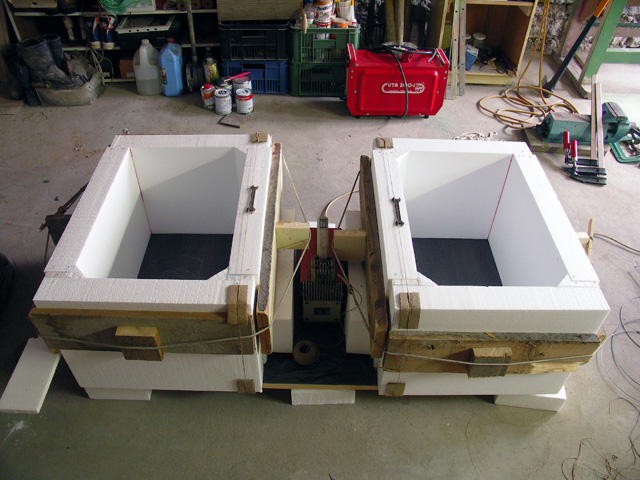
form setup
forms alignment
before ...
... and after
Taking the forms off
After the two weeks waiting i was supposed to come over, take of the shells, fix a few holes in concrete and make the outside finish. but it wasn't as easy as i thought. The polystyrene sticked to the concrete and i had to literally cut it off (fortunately i inherited a nice machete after grandpa, ideal for this job). But it helped with outer forms only. I had to break the core and rip it to pieces with my bare hands. It was terrible job and my hands were all scratched and hurt (the polystyrene itself is soft, but the epoxide resin i used to glue them was very sharp ... and the concrete was sharp as well, not to mention the glass fibre).
After removing outer forms i saw there were a few holes in both shells so i mixed some concrete again and fixed them. And waited again. Then i brushed the outer surface with steel brush and stroked it with grindstone so it got very nice feel. For the final touch i used several layers of transparent colorless varnish. Now it's real plesure to stroke the boxes :).
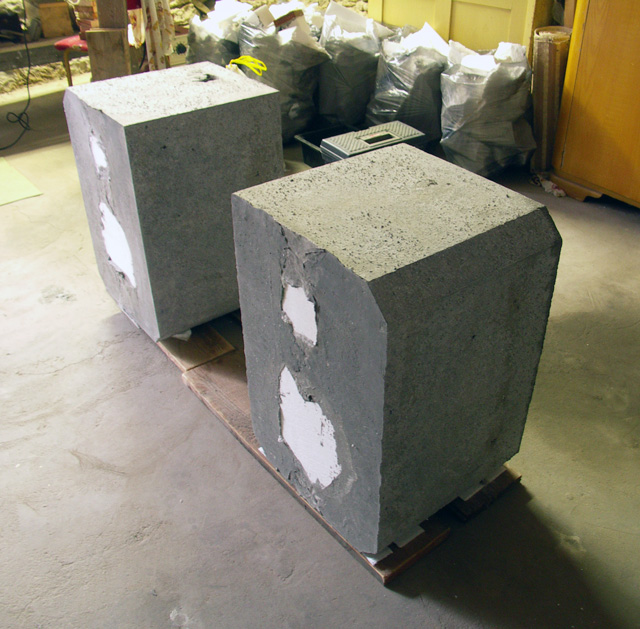
shells, without the outer forms
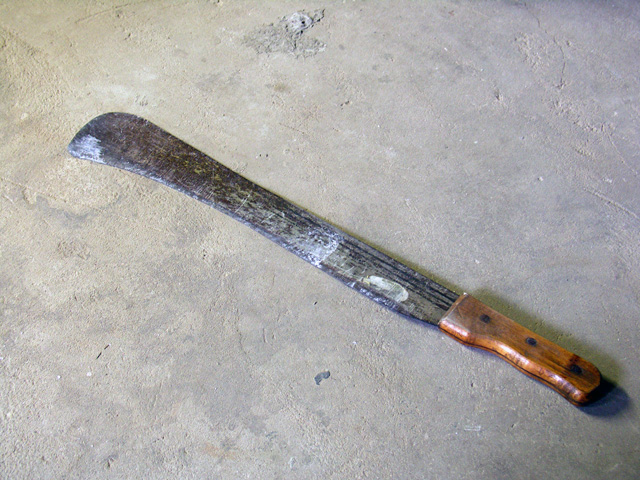
machete
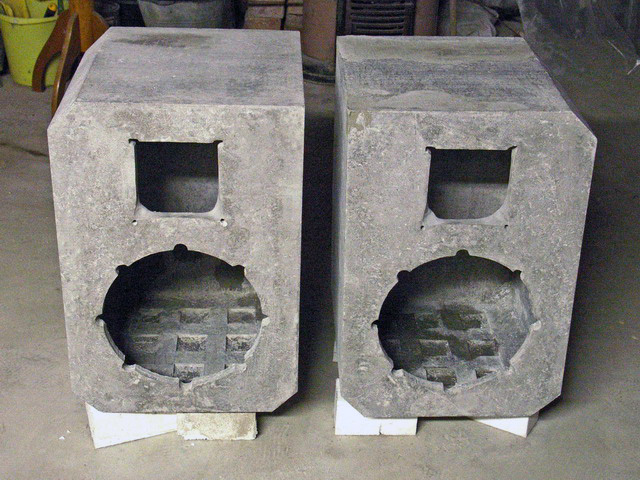
final shells
inside detail
Learning the babies to sing
From this point on it was quite easy. I made paper bowls where the speaker screws should be (there are the holes in concrete), filled them with epoxid resin and then put inside the speakers with screws, both thoroughly greased so they wouldn't stick. It made nice threads for the screws. Then i used some silicone gel under the woofer to straighten the contact surface. For the tweeter i used some gasket tape, the one you put under the windows.
I also put inside some bags with mineral wool to muffle the sound impacts. There is one bag on each wall aparts from the front and bottom wall, they're approx 50mm thick. (the front wall is taken by the drivers and the bottom wall houses the crossover)
For the electrical part, there is 12 dB/octave Linkwitz - Riley crossover with inductance compensation for the woofer. The crossover frequency is set arround 1.5 kHz as far as i remember. The drivers are professional speakers from dexon with 95 dB/W sensitivity, capable of taking 350W RMS.
I had some photos of the crossover and the whole speakers but i can't find them. I'll put them here as soon as i will. For the time being there are at least some photos friend of mine took yesterday:
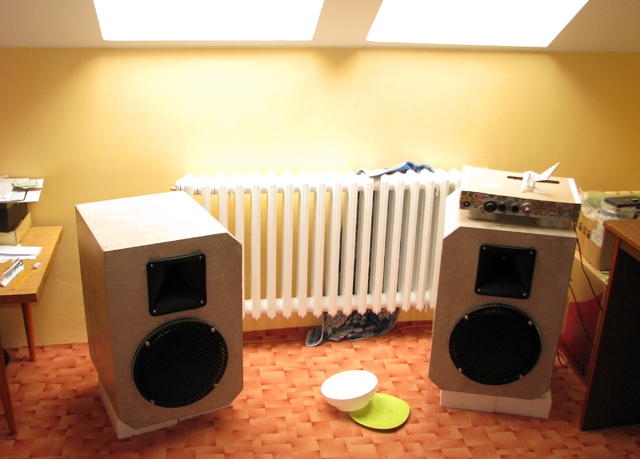
Konkrete Jungle
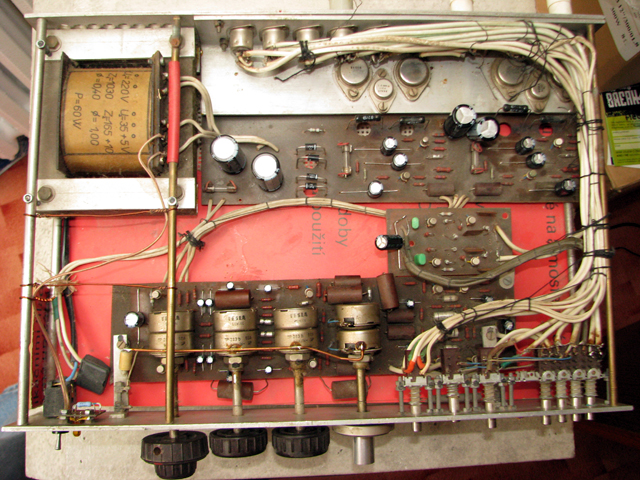
2x 25W amplifier with germanium end stage ... that's what i use at the time being
First tune candidates
I took a great care choosing which tune i'm going to play as the first one. I actually made a list of 'first tune candidates' which later broke up to two lists, second of them having snappy name 'second tune candidates'. But after a lot of time spent, 'The Nine' from Bad Company was chosen and the first test run was conducted with this one.
Then i was listening to them for several weeks and fine-tuning the crossover. In the end i was half satisifed, half fed up and especially i couldn't tell the difference anymore ... so i stopped.